Shooting interviews and pieces to camera
Introduction
Videos are a great way of communicating with staff and customers and there are many situations which require videoing people talking to camera.
These include internal communication videos for large companies that have workforces spread around the country or globally, sales videos talking to customers about the products and services you offer, testimonials from your customers and training or instructional videos, to mention just a few.
So what makes a good ‘piece to camera’ video?
You need the right location and the right equipment and the person being interviewed to be comfortable with their surroundings so they can deliver their best possible performance.
Vox pops
Now you may just want to shoot a ‘vox pops’ type interview, getting a soundbite or short interview of someone at their desk or workspace or on the street. If some background noise is acceptable and it’s not essential to have great lighting this can work and I will go over that scenario in more detail at a later date.
Setting up a really good piece to camera shoot
What I want to talk about in more detail here is setting up a really good ‘piece to camera’ shoot.
Generally when I shoot pieces to camera for clients I shoot with two cameras on tripods with lighting, radio lapel mics and often an autocue. Sometimes I use a third camera and also sometimes a motorised slider.
Style of shoot
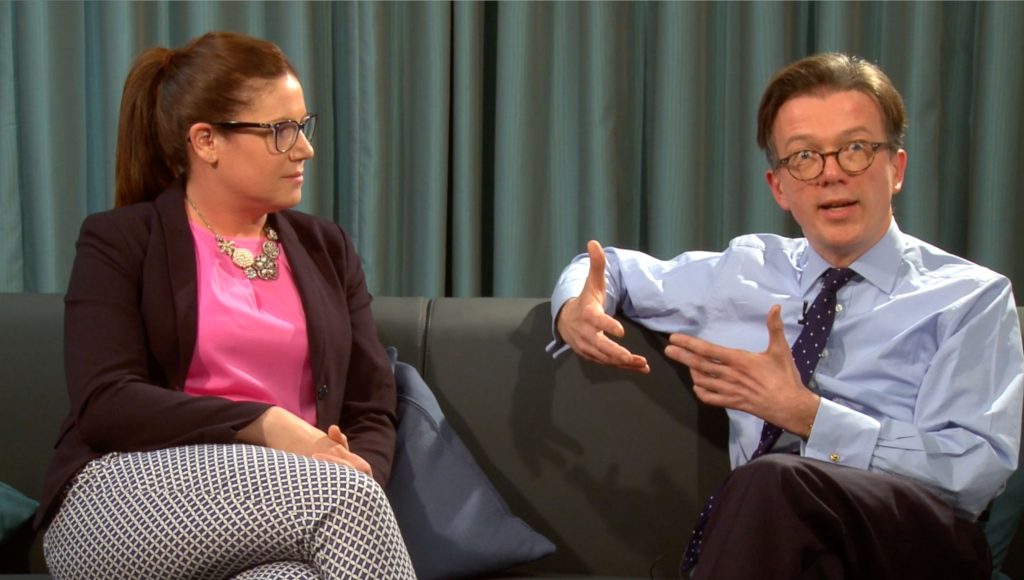
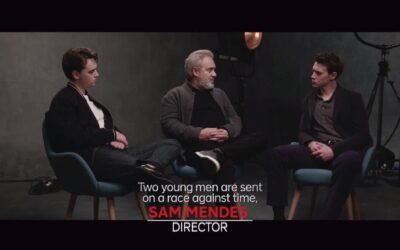
An important point to consider is, if the person is going to be speaking direct to camera or shot from an angle. If there is someone asking questions which are being replied to, then at an angle makes sense, as long as we show that other person even briefly. We can look into that at a later date. If not then speaking into the camera makes more sense to me, but that is just a personal opinion.
Here I will speak about shooting people looking into camera which is what most of my clients want.
Location
Normally the location will be of the clients choosing. Usually their offices. Whenever possible I like to visit the location prior to the shoot and see what alternative rooms, etc, are available at the premises. Also to check for electric sockets to plug into, unless everything being used is battery powered.
Also remember on the day it can take quite a bit of time to set up everything up properly so arrange to arrive with plenty of time to set up. You don’t want to have to rush things.
So lets start with a simple interview of one person talking to camera.
You need to shoot this in a location that the person talking to camera will be comfortable in and be able to deliver their piece to camera without being distracted and unsettled by the surroundings. This will vary a lot from person to person but generally most people prefer to be away from their work colleagues, etc.
The other very important things I am looking for are: Enough room to set everything up nicely without being too close to the person being interviewed and a good background. Shooting someone sitting at their desk with a wall behind them can be used when there is no alternative, but if there is a nice window with a good view, maybe the person can be in front of that or if the office has glass walls with a large office behind it, that can look good too.
Shooting in open plan office environments and other larger spaces can also look really good as it gives plenty of space and is not too formal. But for all locations, you need to be aware of what is in the background. Are there people in the background that wont want to be in the video? Are there computers with personal information on that should not be be showing? Are there rubbish bins, mess or other things in the background that will not look good?
Have a good look around at the different possibilities.
If there are no suitably attractive spaces available I can also bring various background rolls if necessary, though generally clients will want to show their premises, so this could be an alternative too.
Whatever the location it’s going to look best if the person speaking to camera is sharply focussed and the background is not. This is so the viewer’s attention is concentrated on the person speaking. So try to set up where the person or persons are not too close to the background.
The next thing to consider, and this is REALLY important, is background noise. Is the location next to a fire door which is going to be banging away all day long? Are there offices next door with people talking loudly on the phone? Is there loud air conditioning and can it be turned off whist recording? Etc etc. These will cause real problems either making it impossible to get clean audio or having to keep stopping and starting between noises. So there is a lot to think about.
Audio
On the subject of sound, generally I would recommend using a decent radio lapel mic wherever possible. I normally put the mic quite near the top of the persons shirt or jacket, etc, but with the mic angled down. If the person moves their head sideways or up and down this helps keep the sound level even.
If you are shooting more than one person it’s best to put a radio lapel mic on each one and have each on a separate audio channel too. Obviously if shooting a large number of people this may not be an option but here I am talking about shooting just one or more persons.
I use a Sony FS7 which can take 4 audio channel but if you are say interviewing 3 or 4 people each with their own radio lapel mic and therefore you have more audio channels than your camera can take then you will need something like a Tascam DR70D or DR60D sound recorder. If you are using one of these you will need record the audio onto the internal SD card in the unit to get good quality audio. I have tried using these to supply audio from them to a Sony A7r11 and Canon EOS6D and the quality was not good so use the audio tracks it records internally. Also use an external power source for them. Either a normal USB charger or external USB battery. They really go through batteries very quickly.
I cannot overemphasise the importance of god quality sound. Having a beautifully shot video but with poor quality audio will mean you wont end up with a happy customer. The sound is just as important as the video footage, in fact maybe even more important.
Lighting
So back to the visual side of the shoot.
Every location is different but if shooting indoors it is normally best if you can light the subject too. If shooting outside then probably a reflector will be a very useful aid to help give a more even lighting level.
Either outside or shining though a window, if the sun is directly behind the person this can really make it difficult to get the shot looking right so bear that in mind. Also if there are clouds in a blue sky, the light levels are going to change a lot as the clouds go past the sun, so bear that in mind when choosing a location. Outside you also have the weather to contend with. Cold, rain, wind, etc. So probably not a good winter option.
For this example we will look at indoors
Hopefully you have chosen the best location possible and it will be good enough to do a decent shoot and you have worked out where your subject will sit or stand.
Next it is lighting the person. I use daylight balanced LEDs with soft boxes, normally 2 in front of the person each at about 45 to 60 degrees angle, so about 90 to120 degrees between them. If there is no light behind them, I will also often use a third light behind the person at about 60 to 70 degrees to the side to help ‘kick’ them out from the background. It puts a shine around their hair and shoulders.
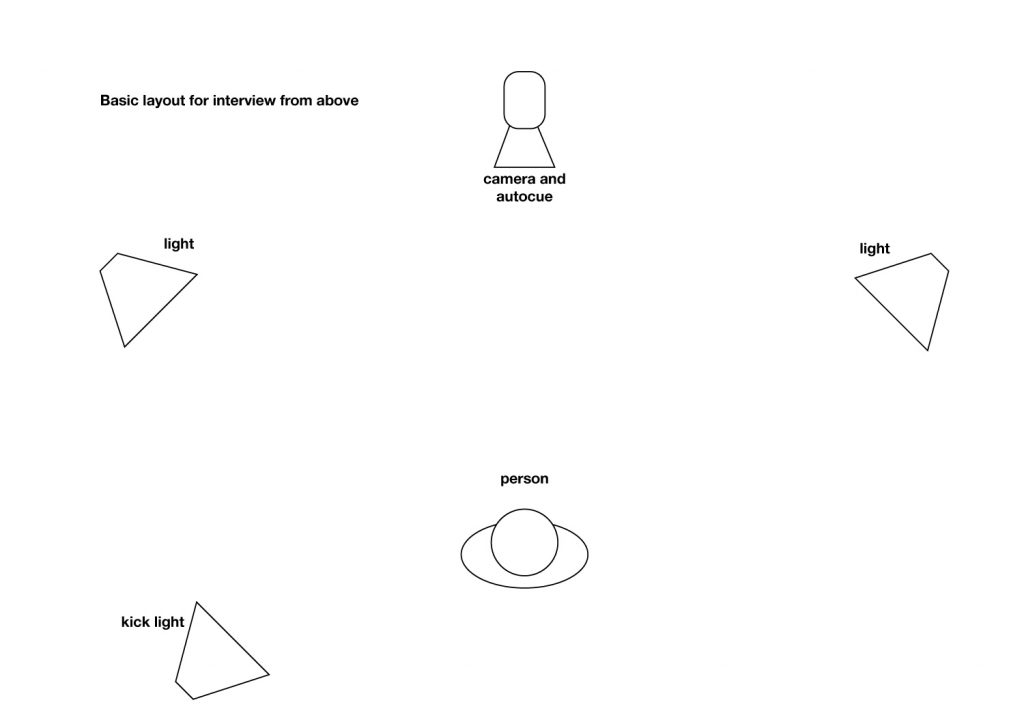
If possible you want to put the lights well above the height of the people so they are looking down on them rather than being at face level. This will give a more natural look, but often is difficult to do, due to the low height of ceilings in many offices.
This can be a real problem when people are wearing glasses. The lights will probably be reflecting in the glasses, so look out for this as it’s really distracting when viewing the video. If it is reflecting you will need to move the lights further to the side of the people being shot. If the people are sitting down that will help to get the lights further above them and help reduce the problem so bear that in mind when agreeing the location.
Sometimes the office lights can be causing the reflections so be aware of that too. Also, if you are using a combination of your own lights and the office lights be aware of the different white balances of the lights and make sure everything looks right. You may need to turn off the office lights. Experiment a bit and spend time making sure that there are no reflections in the lenses of glasses and also looking at the background for reflections and other problems.
Autocue
Generally I shoot people looking directly into the main camera. I often have an autocue on the camera too. This is a real help, both to the person speaking and to me. It can make a massive difference to the quality of the delivery and greatly reduce shooting and editing time. So definitely this is something to offer to clients. There are a few people who work really well without the autocue and in fact are better without it, but most people want to use them and are much better with them. And they really appreciate the fact it makes it much easier for them.
Its great if you can get the script far enough in advance to have a read through it to check for any mistakes. Also read it out loud and see if there are any tongue twisting phrases and check with the clients to see if it’s OK to change as necessary. Also remove the spaces between paragraphs. Then you won’t need to change the autocue speed much. Finally get it loaded ready for use on the day. Doing these things will really help on the day.
Setting up the camera
Get the lighting levels correct on the person being interviewed. Generally I much prefer to use manual settings for exposure, white balance and focus. Then things won’t change without me noticing. Autofocus can be a nightmare, especially if your subject is not in the centre of the screen. Much better to do it manually. It can also be good to get an external monitor with peaking, focus magnification, zebra and other features. The AndyCine is a good model for this and if you are using it with a mirrorless camera or DSLR where the battery life is a problem you can power your camera from an output on it as long as you get an adaptor. If you are recording really ln interviews you may want to get an Atomos which will allow you to record onto it as well as use it as a monitor. This can also give you a back up recording in case the cameras’ memory card corrupts.
You want to avoid wide angle lenses and also use a wide aperture so there is a narrow depth of field so that the person can be sharply focussed which the background is out of focus. So maybe on a full frame camera shooting between 70 and 135mm depending on the size of space available.
How close-up a shot to take of the person will vary on what the client likes and what the person and location look like. Generally on the main camera I will shoot someone with a bit of space above their head to just above the waist or a bit tighter.
People delivering pieces to camera are unlikely to get everything done in one take. It can happen, but virtually never does. So what we will need to do is cut together the various best takes, as seamlessly as possible, to try and make it look like it has been done in one take.
I suppose one could keep trying till one got a perfect take but after a certain number of takes the delivery from the person is liable to start getting worse rather than better and normally they have other things they need to go and do. So inevitably we will end up cutting together some different takes.
So how do we disguise the breaks.
- I use FCPX which has a transition called ‘flow’. If I cut 2 clips together and the person is in the same position as in the previous shot and has not moved his or her head much this can of work really well. looking at it once rendered, the viewer would not know that there are 2 separate clips and this is my preferred method.
If the first method cannot work then there are 2 alternatives
- I can cut to a shot from the second camera to disguise the cut
- I shoot in 4K and I can digitally zoom into one of the 2 clips to disguise the cut and still have a sharp image.
So to achieve the first method we need to make sure the camera is in the same position for all takes and that the person is in the same position as much as possible. This also holds true for digitally zooming in though is not as important. So ideally locking it off on the tripod is good.
With a second camera I can shoot a wider shot at the same time. The second camera can be placed either as close as possible to the main camera or off to the side. Cutting to the second camera can look really nice visually. You often the see this used in TV interviews sometimes even showing the lights and cameras etc. But I have found my clients generally don’t want this. They want it to look like it was delivered in one take. Cutting to a second camera makes it look more obvious it is disguising a cut. If I have more than one person being shot at the same time then cutting to a wide shot of all of them does work well as it is logical and so is more acceptable. For this I have the second camera as close to the main camera as possible. Cutting to this wide shot when one person finishes speaking and another starts also allows the man camera to be moved to point to the new person before cutting back to that shot.
If shooting just one person it can be good to shoot from a really different angle even using a quiet, motorised slider but be aware of what’s in the background and the fact that the client will probably want to use these shots as little as possible.
So hopefully that gives you a quick overview of shooting interviews.
In my next update I will go into more details about shooting and editing pieces to camera and about shooting other types of interviews
More articles you may like
Which LED Video Wall solution does your event need?
[dipi_breadcrumbs bc_home_icon="on" bc_home_size="14px" bc_is_post_type_root="on"...
Celebrating 20 Years of Mount Pleasant Studio
[dipi_breadcrumbs bc_home_icon="on" bc_home_size="14px" bc_is_post_type_root="on"...

What is Thought Leadership in PR copy and why is it important?
[dipi_breadcrumbs bc_home_icon="on" bc_home_size="14px" bc_is_post_type_root="on"...